Add a thing, say where it lives, draw the room it lives in, and walk through it. Everything
here works with no account and no internet connection.
You do not need an account.
Nothing in this guide requires signing in. An account is only for sharing one inventory with
other people, or keeping several of your own devices in step — that is
step 7, and it is optional.
Prefer to watch first?
There is a minute-and-a-half overview video of the app on the
home page — adding an item, drawing a room, and walking through it.
First: the five tabs
Everything lives behind five tabs along the bottom (or the side, on a wide screen).
Tab
What it is for
Home
Your dashboard. Live 3D previews of the spaces you used last, counts, low-stock and expiry warnings, and a search box that looks in both items and locations.
Items
Everything you own, as a list. Search, filter, sort, adjust quantities.
Locations
Everywhere you keep things, as a tree. This is also the way into the designers.
Scan
The camera. Scan a product barcode or one of the app’s own QR labels.
More
Three tabs of its own: Account (sign-in, households, sync), Settings (appearance, notifications, label printer, backup, export) and Subscription.
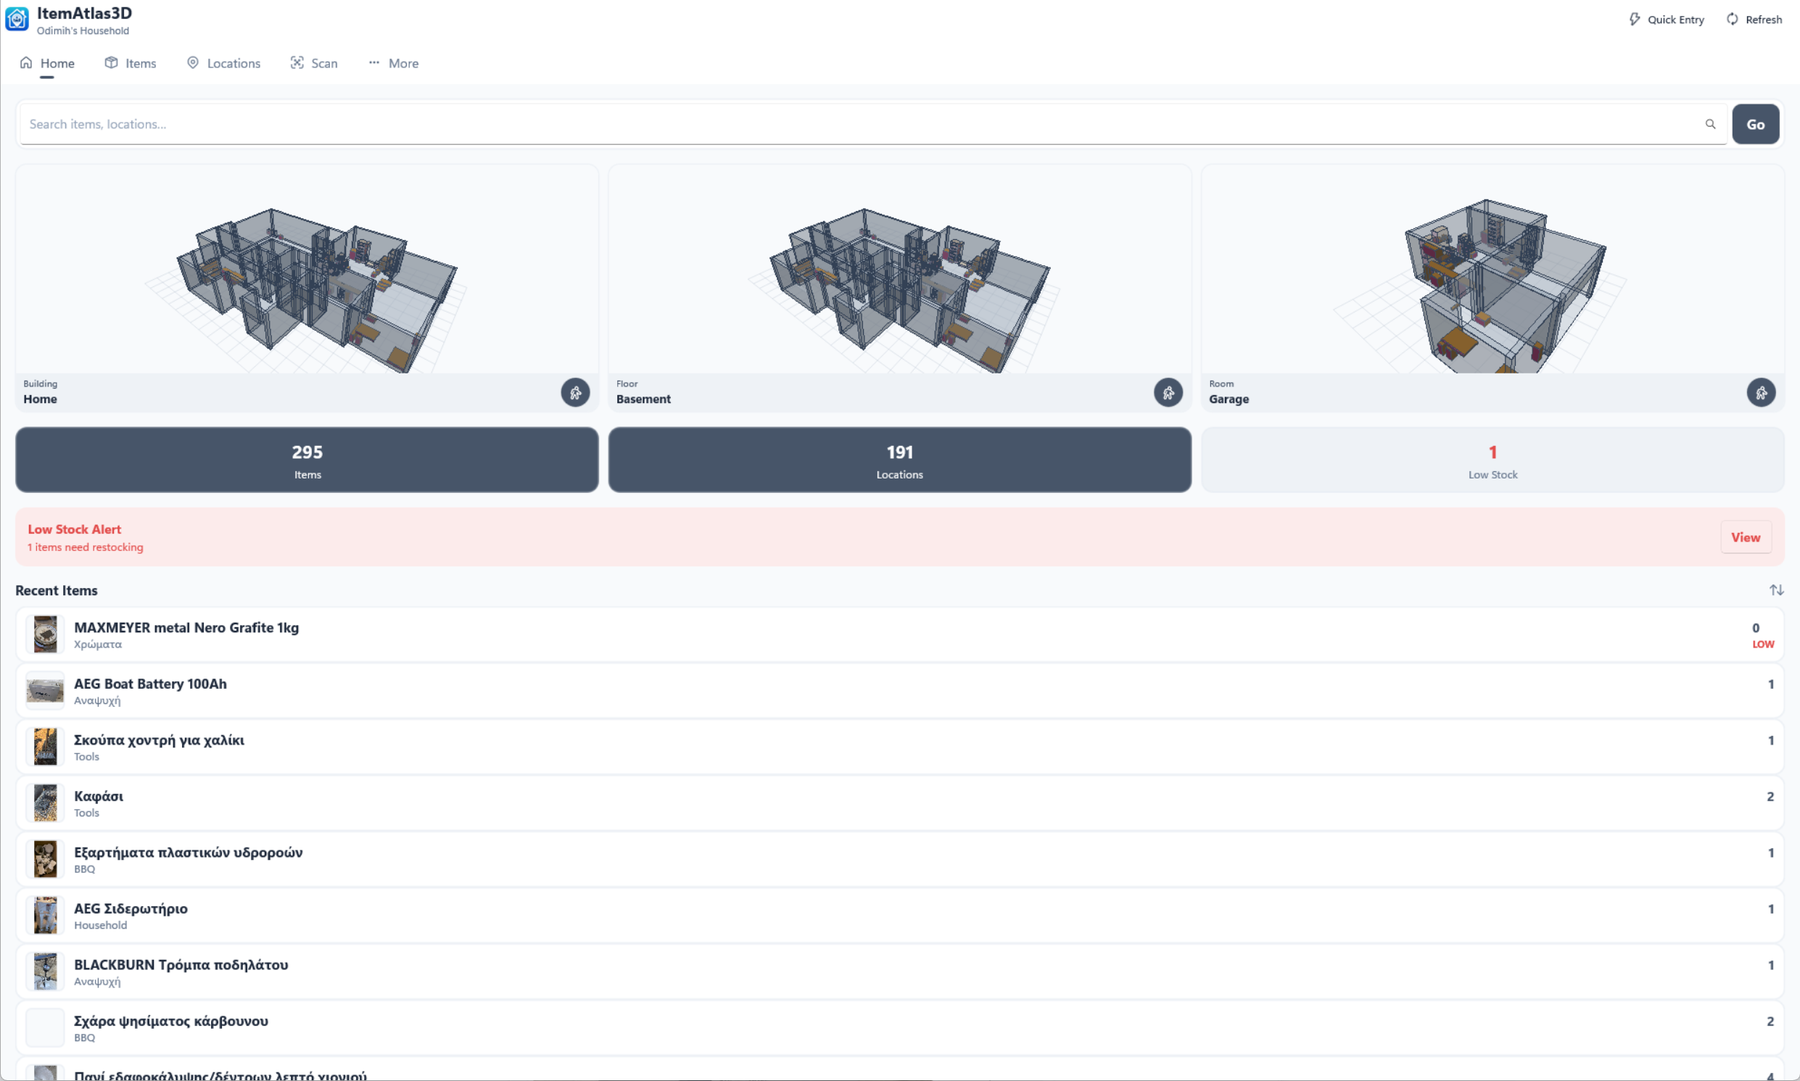
The Home dashboard. The three tiles are the Building, Floor and Room you used last,
drawn live from your own layouts — tap one to reopen its designer, or the small walk
button in its corner to step straight inside it. Underneath: the counts, a low-stock alert with
a View button that opens a pre-filtered list, and recent items.
Step 1 — Add your first item
Go to Items and tap in the toolbar. Give it a name and
save. That is the whole requirement — everything else on the page is optional and can be
filled in later.
Worth setting while you are there:
Unit — pieces, kg, litres, rolls… Type your own if the list does
not have it.
Category — a colour and a name, for filtering later.
Photo — take one or pick one. Tap a photo to view it full screen.
Barcode — tap Scan beside the field to capture it with
the camera. From then on, scanning that product jumps straight to this item.
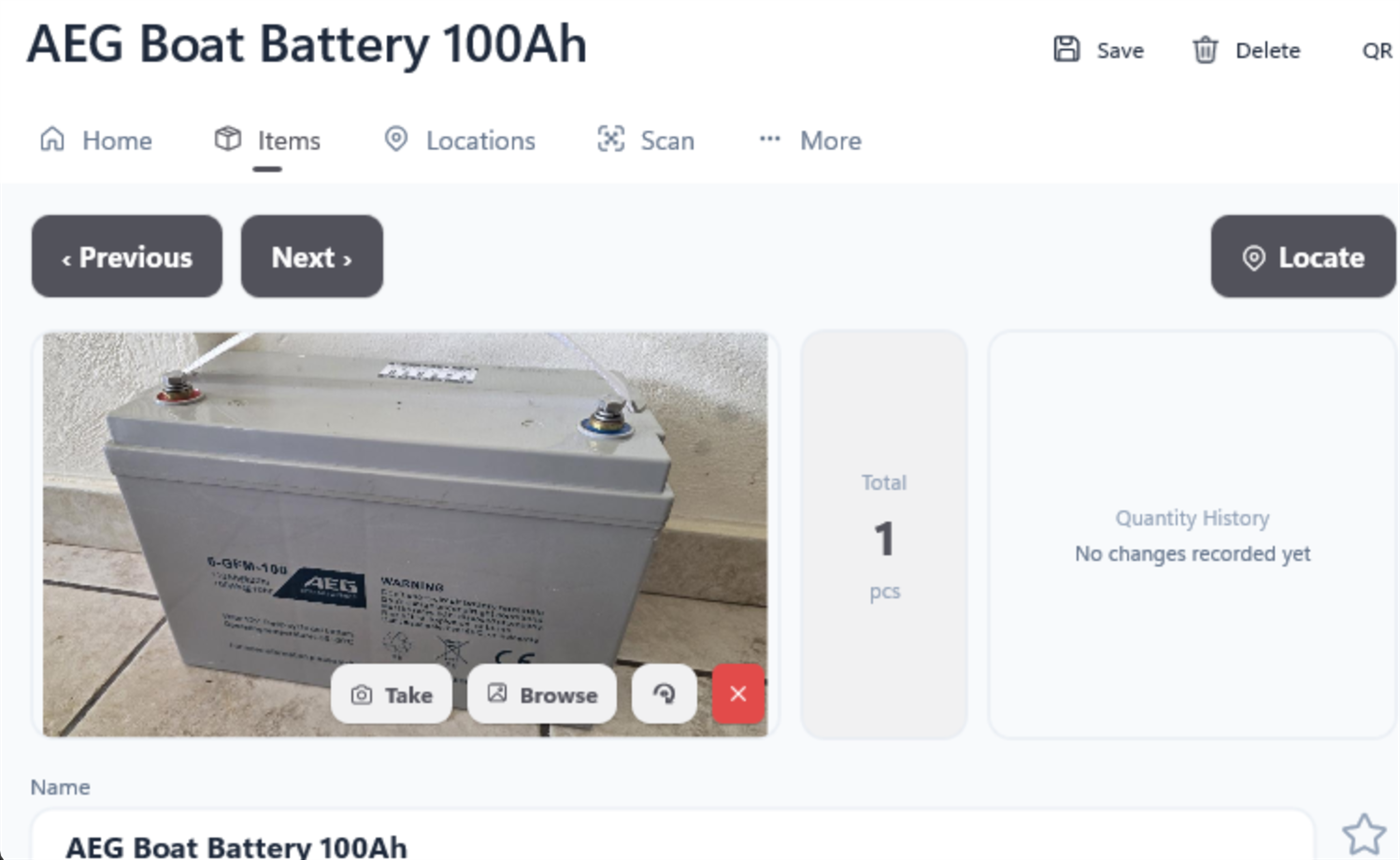
The item detail page. The quantity controls appear once the item has somewhere to be.
Adding a lot of things at once?
Use Quick Entry instead — the button on Home or on the Items list.
Pick a location once, then type name and quantity over and over. It remembers names you have used
before and offers to complete them, and it can photograph each row as you go.
Step 2 — Add somewhere to keep it
Go to Locations and tap . A location needs a name and a
kind. The kind is what decides which designer it opens later:
Building▸Top level only — holds floors
Floor▸A level of a building — holds rooms
Room▸A room you can draw and walk through — holds furniture and items
Start small.
You do not have to build a whole house. A single Room at the top of the tree,
with nothing above it, is a perfectly good place to begin — add the floor and the building
later if you ever want them.
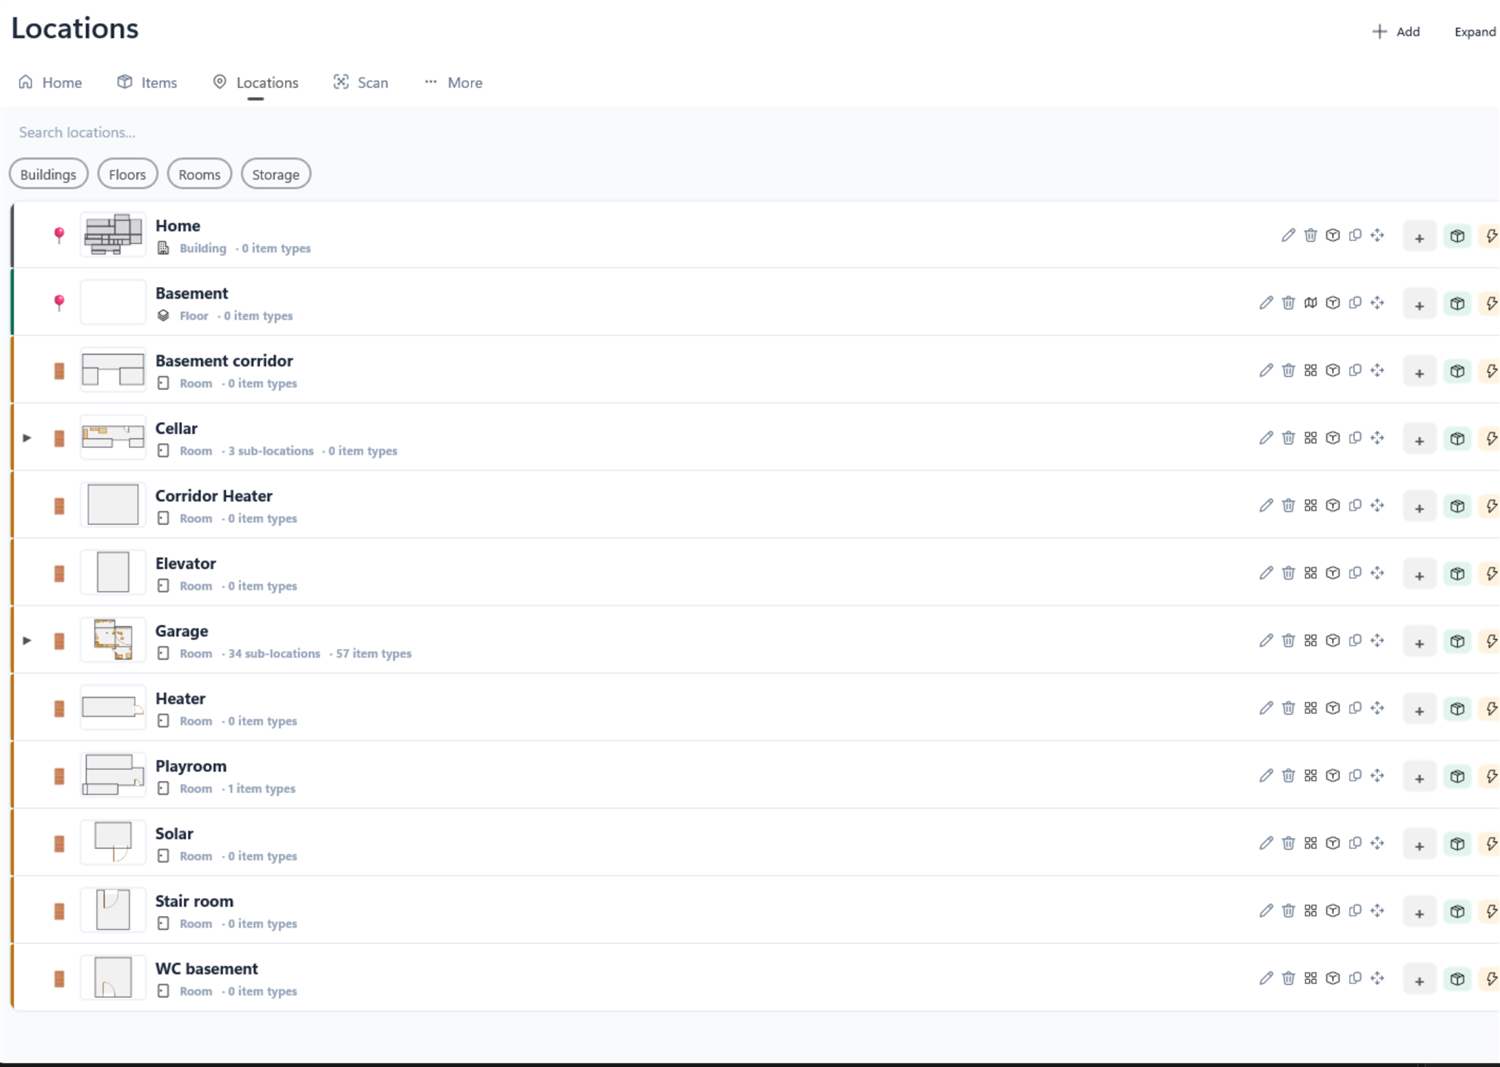
The Locations tree. Each row shows a small plan of what is inside it; tap that plan to open the designer.
Step 3 — Put the item in the location
Open the item and tap Add location, choose the location, and enter how
many are there.
An item can be in several places at once, each with its own count — four screws in the
garage and two in the kitchen drawer is two rows on the same item, not two items. The total is
shown at the top.
From then on the − and + buttons on the Items
list adjust the quantity without opening anything.
Step 4 — Draw the room to scale
This is the part that makes ItemAtlas3D different from a list. Open your Room in the
designer: on the Locations tree, tap the icon on its
row, or tap the little plan picture.
Give the room its size. The first time, it asks for width and depth in metres
(or feet). Measure roughly — you can change it whenever you like.
Place a piece of furniture. Pick a type from the palette along the top
(Cabinet, Shelf, Box, Wardrobe…) then tap where it goes. A panel opens so you can name
it and set its real size.
Put things in it. Every piece of furniture you draw is also a location, so it
can hold items or more furniture. Drag an item onto it, or tap the piece and use
Items.
Add a door from the palette, so the room joins up with the rest of the home
later.
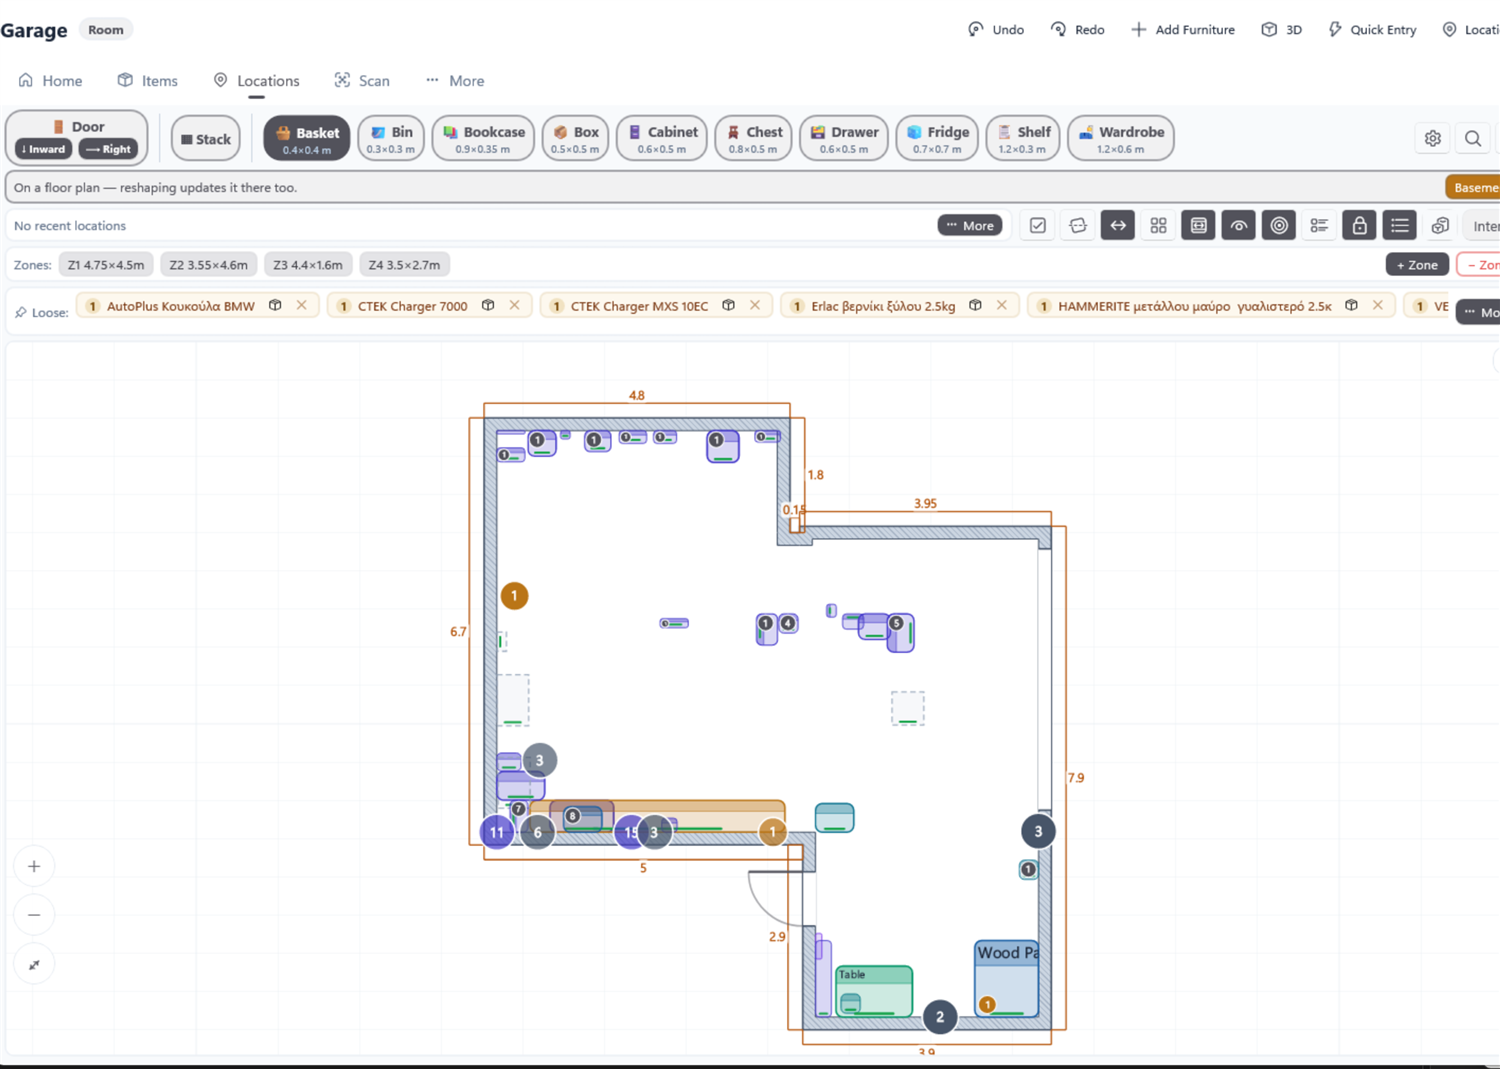
The room designer. Furniture is drawn to scale; the badge on a piece counts what is inside it.
Getting around the canvas
Pinch or scroll to zoom, drag with two fingers (or hold Alt — ⌥ on a Mac — and drag) to pan, and use the
+ - ⤢ buttons in the corner if you prefer. ⤢
always brings the whole plan back into view — zoom also goes further out than that, so you
can see the ground around a building.
Two aids worth knowing early turns on a dot grid at a real spacing, named in
a chip in the bottom-left corner. is a ruler for
measuring between two points, and drops a
spacer: a guide box of a size you type, for a walkway or a clearance, which furniture snaps to but
which holds nothing. All three are in the manual.
Step 5 — Look at it in 3D, and walk through it
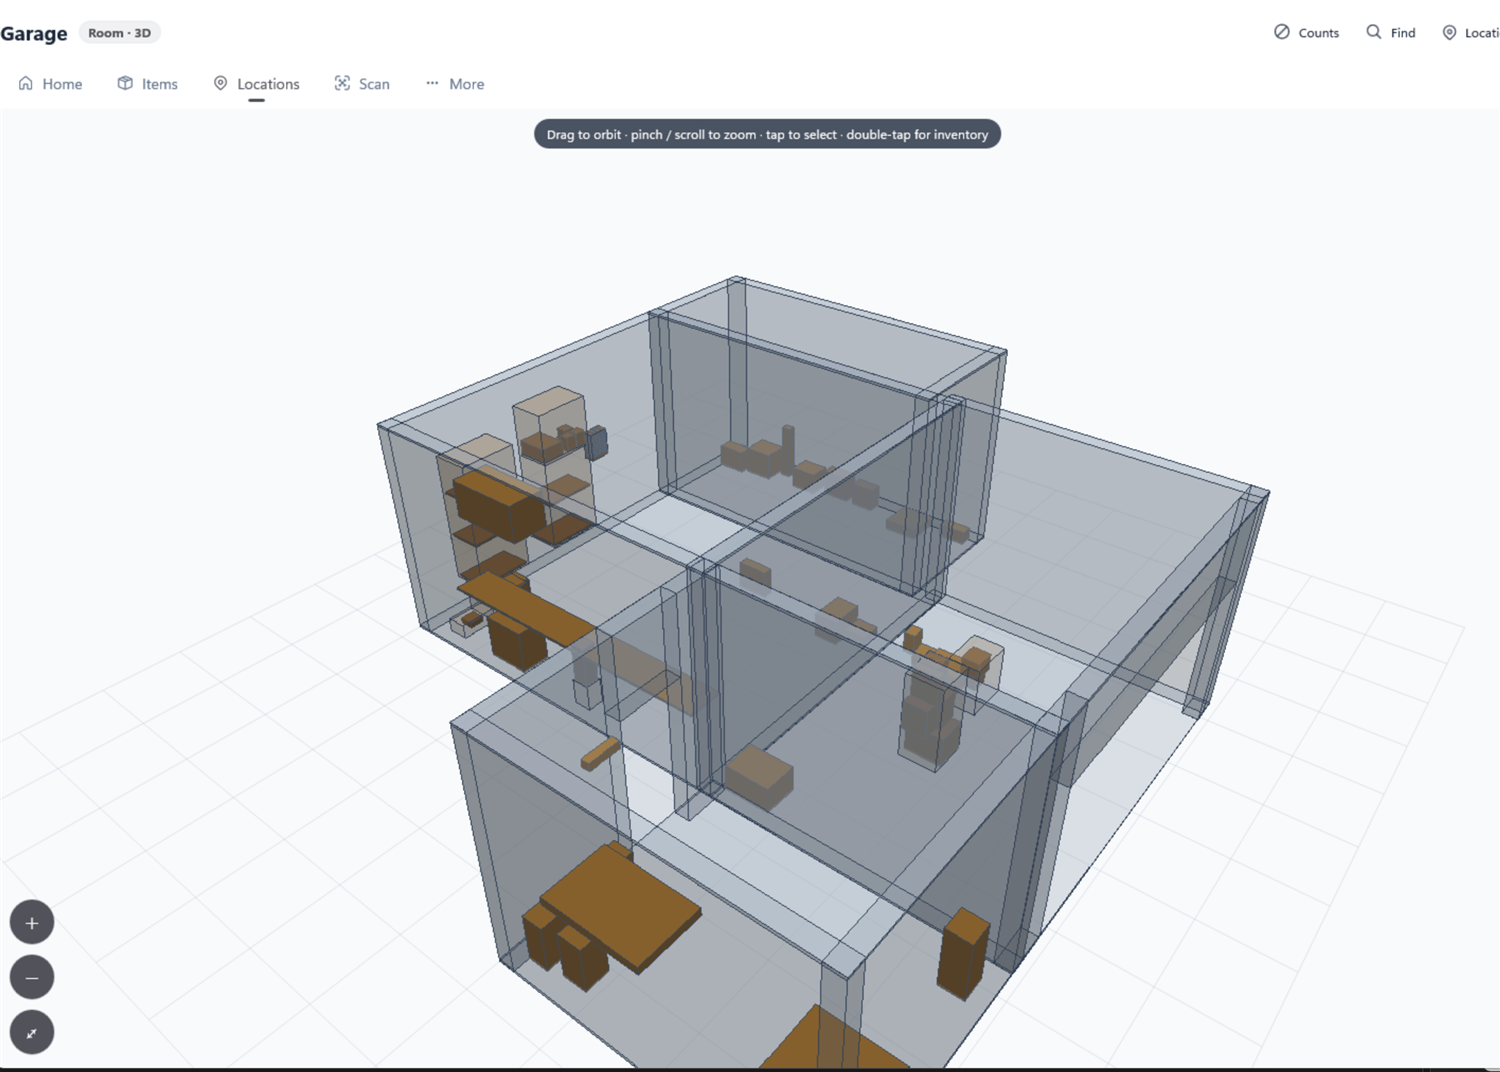
Tap 3D in the designer’s toolbar. The room is rebuilt as a real
three-dimensional model, with your furniture at its true size and a badge over anything that has
things in it.
Drag to orbit, scroll or pinch to zoom.
Tap a piece twice to open what is inside it.
Walls turns the room shell off, so you can see the contents from above.
Then tap Walk. You are standing inside it. Move with the on-screen stick or the
WASD
keys, look around by dragging, and a panel names whatever is in front of you and lists what is
inside it. Walls stop you; doors let you through into the next room.
The 3D view of one room. The same view is available for a floor, a whole building, or a single cabinet.
Step 6 — Find things again
Which is, after all, the point. There are four ways, and each suits a different question:
You want to
Do this
Look something up by name
The search box on Home searches items and locations at once. The Items tab searches items in more depth, with filters.
Know where something is
Tap Locate on the item — the app opens the right designer, zooms to the spot and highlights it.
Identify a thing you are holding
Scan its barcode on the Scan tab. If it is already yours, its page opens.
Identify a box you are looking at
Print a QR label for it and scan that. Labels are made from any item or location page.
Inside a designer there is also Find, which searches only that space
— useful once a garage has fifty boxes in it.
Accents and case do not matter.
Searching for skoupa finds Σκουπα, and
typing two words finds anything matching either, with the closest matches first.
Step 7 — Optional: share it with your household
To let somebody else see and edit the same inventory:
Both of you: More → Account → Sign in (create an account with an
email address and a password).
On your device: pick the household, then press New Code. You get an 8-character
invite code, good for seven days.
On theirs: Join Household, and type the code.
From then on both devices show the same inventory, and each edit reaches the other the next time
they sync. It works offline — changes queue up and go when a connection returns.
Sharing is a Cloud plan feature, and only the household owner needs one. Everyone
else joins for free — up to 2 people on Cloud 2, or 5 on Cloud 5. Without a plan the app
stays local and is limited to 20 items and 10 locations; a one-off Offline purchase lifts that
limit. Prices are in the manual.
Step 8 — Keep it safe
What
Where
Backup — one file with the database and every photo
More → Settings → Data → Backup
Restore it on this or any other device
More → Settings → Data → Restore
Export as JSON, to move your data elsewhere
More → Settings → Data → Export
If you signed in at step 7 your inventory is already copied to the cloud, but a local backup is
still worth having — it is the only copy that is entirely yours.
 ItemAtlas3D